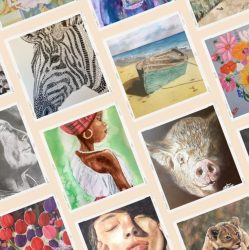
Acrylic Flower Meadow
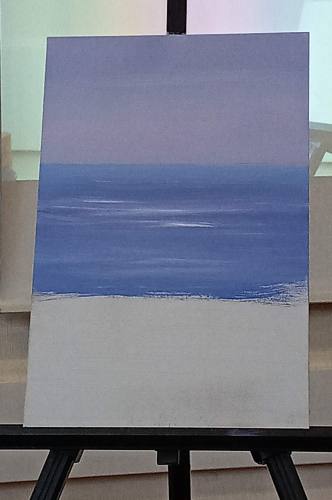
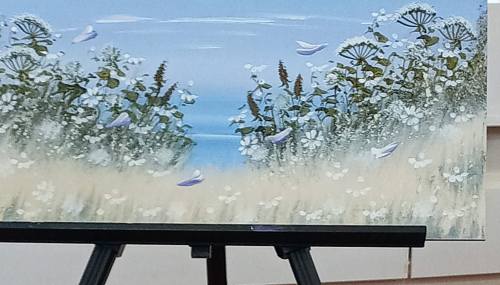
Mary began her demonstration of a sea view with wild flowers on MDF board (her preferred surface for all her paintings) pre-primed with ordinary wood primer upon which had been drawn her horizon line a third of the way down.
Using Winsor & Newton Galeria acrylics and a large decorator’s brush, she painted the 1st layer of sky using titanium white, ultramarine blue and permanent magenta, with broad brushstrokes across the board, slightly darker at the top, becoming lighter towards the horizon. Adding more blue to the mix to create a darker blue, and the same brush, Mary added in the sea, using broad strokes back and forth across the board. This whole process would need to be repeated 3 times, allowing each coat to dry completely before painting the next. Waves on the water could be added or contrails in the sky could be added when all three layers were dry.
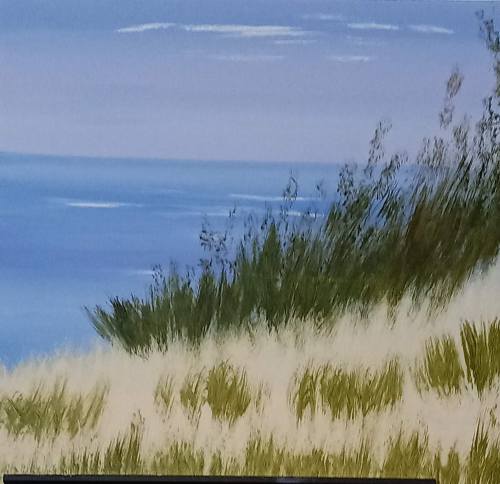
Switching to a larger board painted to this stage, with a bristle brush dipped into white and Naples yellow creating a creamy colour, vertical brushstrokes with broken edges were added to the blank cliff area in quick, spontaneous movements. This would need to be repeated again, so Mary changed to another board already painted and dry, ready to demonstrate the next stage.

Using Hooker’s green and burnt sienna to form a dark green, and a bristle brush, the greenery and grass quickly brushed in here and there, including vertical conical shapes which would become buddleia blooms.
Switching to a “merlin” brush (various names: eg foliage brush or wizard) the dark green element of cow parsley was added as a simple half-hoop. Slodges of green were added for dandelions.
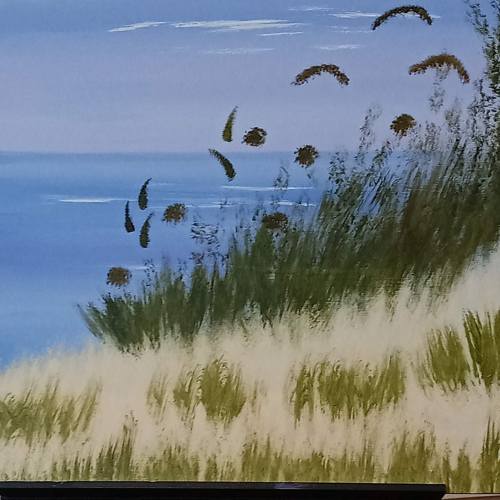
Switching to another partly painted board, neat titanium white on a dry brush was used to paint the flowerheads on the cow parsley, likewise with the dandelion clocks. Random brush strokes for daisy buds were added. Explaining that this should only be done if the surface was dry, a further mix of yellow/white using a slightly damp brush was added. A splatter of paint was added as random flowerbuds. Leaves were added on a rigger brush, using the length of the brush flat against the surface in swift movements. With the same green colour mixed with water to an ink consistency, the stems of the cow parsley were added, a few straight, most bent or curved as in nature. Small “kisses” of paint were added to the stems, similarly with the dandelions, ensuring they were not regimented, and totally dry before the next part of the process is carried out.

For daisies, six simple brushstrokes in an arc from the centre using a downward movement were added. Using ultramarine blue and magenta on a brush, then loaded with white (double loading), ensuring the white was at the top, Mary added convolvulus (bindweed) buds, and allowed to dry. With ultramarine and magenta mixed with a tiny drop of water loaded onto the brush it was then double loaded with cad or Naples yellow, the centre of the daises painted. Using Hooker’s green and burnt sienna with a tiny drop of water, the outside green of the flower added to the base of each convolvulus, then lemon yellow with neat white at the bases of the buds.
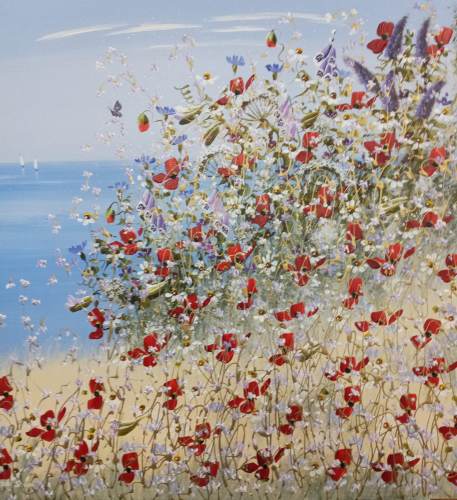
Using Winsor violet (or ultramarine + alizarin crimson) and a small foliage brush, the buddleia flowers were painted in down one side of the green, then a little white added to highlight the flowers keeping the light from the same direction through the painting. Foxglove flowers were created using dark violet and white on the same brush in a three single stokes downward. Blackberries were added here and there using ultramarine blue and alizarin crimson as simple circles. Using a paler mauve dipped into white, the harebells were added. All these movements were quick, random and spontaneous. To create the lips and spots on the foxgloves, using a thin rigger and white, these were painted in and a tiny mark of darker mauve added into the flower. The same colour mixed with a tiny bit of white and a thin brush, the “fruits” of the berries were added with a tiny tip of white on some as highlight. Blackberry flowers were added using pink to white colour and painted as three petals for each flower, these were spread across the foreground with a spot of cad yellow and white for the centre of each.

Changing to yet another part painted board already at the above stage, it was time to add the poppies, or cosmos. Usually painted in red, this time Mary used magenta and double loaded with white on a half-inch synthetic flat brush. The flowers were formed from four petals painted from the outside to centre, a few with 2 or 3 petals. The centres were painted the same as for the daises. If creating poppies, the centre could be painted using ultramarine and burnt sienna to make a black.

Stems were added using a No4 or 5 brush with Hooker’s green and in various places lightened with lemon yellow and/or white for highlight. Mary completed this painting by added a butterfly to one of the flowers using a thin brush and dark sienna creating three strokes for the wings and black for the body and antenna.

However, this was not the end. Mary’s unique style of painting finishes with swirls and squiggles over the flowers using gold acrylic enamel paint and a sprinkling of diamond dust, a process which takes many hours to complete. Below is one of her completed paintings.
To a full-house audience, who thoroughly enjoyed this demonstration Mary made the whole process look easy and simple whilst giving lots of advice and tips/hints including:
1) Avoid cheap paints because they contain more polymer and less pigment and do not give good results.
2) Avoid using emerald green, its colour is garish and acid and unnatural.
3) Always allow plenty of time for each layer of paint to dry thoroughly. If you add a layer of paint on top of one not fully dry, the paint will lift off the surface.
4) Painting with acrylics is not a quick process. It can take hours. One needs discipline, organisation and patience as each element and layer dries.
5) Practice your brushstrokes, marks and splattering techniques before committing to your painting.
6) No matter the subject being painted they should all be approached in the same order: background to foreground, top to bottom.
7) Paint what YOU want to paint, not what you think others will like.
8) Some brands of acrylics do dry slightly dark so mix colours a lighter than you think you need.
A fabulous, enjoyable afternoon. We hope in the future Mary will join us again for a workshop; fingers and paintbrushes crossed.
To see more of Mary’s work visit Clarendon Fine Art

You must be logged in to post a comment.